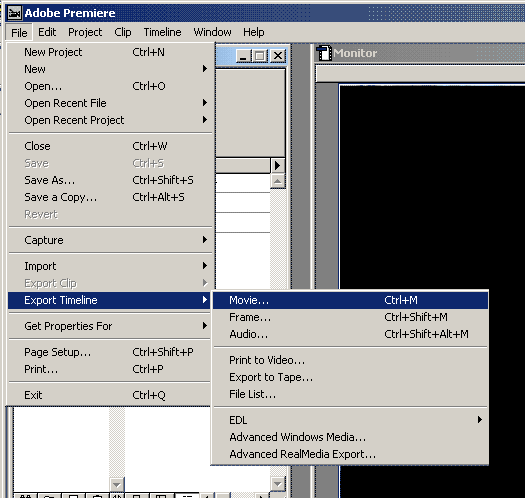
Exporting Your Video from Adobe PremiereEssentially this part is very very easy, but there are some things here that people make mistakes on so it's worth going through what you need to do. Firstly, your export settings should be identical to your project settings in every way but the codec. This means that in order to get the same looking amv out of your project that you saw in the preview window then you need to keep all the settings exactly the same. The only exception to this rule, as I have said is the codec. Secondly, in this guide we are going to export the audio separately as well as attached to the video - this will give us easy access to the audio stream later on. Also, this guide is geared towards compression with software codecs - if you are using the features of a hardware video editing card (such as a DV card) then you should consult the manual for that card. Of course, it should be equally possible to still use these settings but you will lose any realtime rendering benefits (and archiving benefits with DV). Ready? OK, go to Export Timeline ->Movie
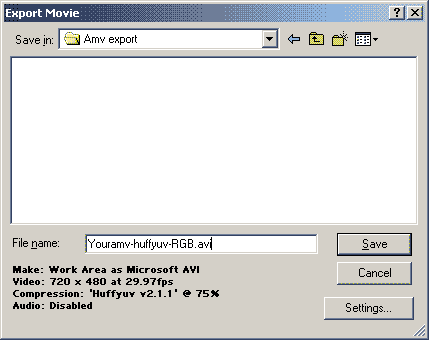
You will then see a dialogue box that looks something like this:
Choose an appropriate folder and name for your
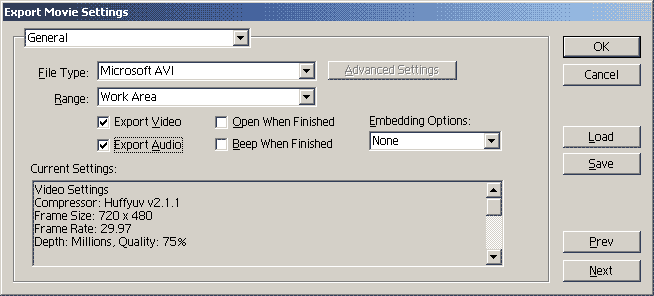
file. Once you have done that, Click Settings: General Settings:
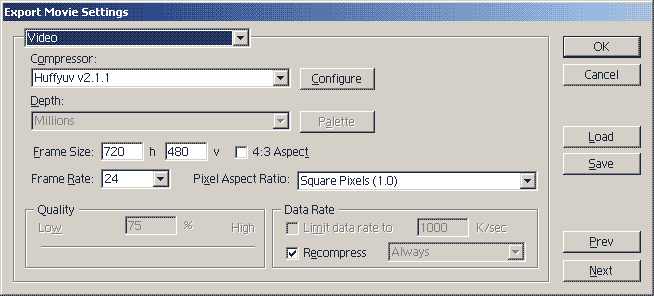
Video Settings:
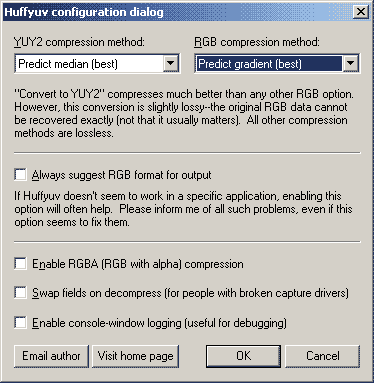
HuffYUV actually has 2 modes of compression - YUV and RGB. You
should always export RGB from Premiere as it is the native editing
colourspace of the program - this ensures that everything will look as
it is supposed to. To make sure that HuffYUV compresses the footage in RGB mode,
and to set up other options, choose 'Configure' next to the
compressor.
In RGB compression method you should always have Predict
Gradient (best) selected. This will make sure that when Premiere
sends the codec RGB footage that it is compressed as RGB and not as
YUY2. The other options in the Huffyuv settings are not actually
important when exporting from Premiere. Enable RGBA compression
is useful if you have used Alpha Channels but this is mostly a feature
you would need more for Adobe After Effects. Enabling this option in
Premiere would just give you needlessly bigger files. Once these options are all selected, click OK to
return to the Video comression settings menu.
If you do have RGB compression enabled in huffYUV then make
sure you select "Always Recompress" in the Premiere export
settings. If you don't do this then Premiere can sometimes do a direct
stream copy on clips and pre-rendered scenes and this could be in a
different colourspace when using Huffyuv (as it has two modes). If this
happens you will end having parts of your amv that are a screen of
rainbows as the codec is only decoding either RGB or YUY2 not changing
between them. Hence, you should always recompress to be certain it's
compressing correctly. Audio: 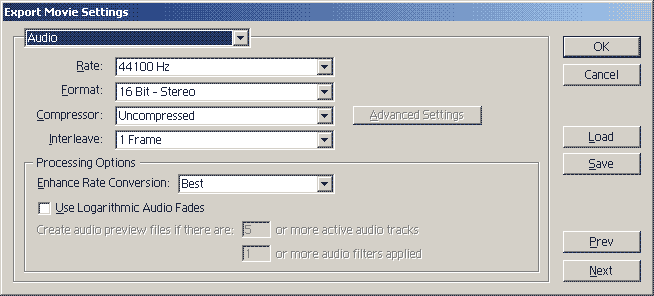
We will also be exporting a seperate wav
version of this audio stream, for processing in other applications.
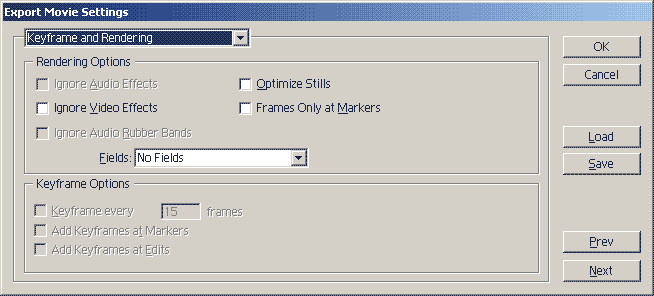
Keyframe and Rendering:
Exporting the video file OK, you should now be good to export, click 'ok' and choose your file name. Be warned, these files are big. If you are using Windows 2000 or XP make sure that you export to a hard drive that uses the NTFS file system otherwise long amvs might exceed the 2 gig file limit on old FAT32 drives. If you are running windows 98 then you are going to be limited to 2 gig - if you can't export the whole movie for this reason then you will have to select a frame range and export it in two or more sections. You can join these later in AVIsynth as follows:
If you still have problems with exporting like this, then you may want to download and install the Premiere Frameserver from www.videotools.net - however, I do not recommend using this for multiple encodes (including 2 pass encodes) as it is a very slow way of doing things. You'd be better off with a master rendered file to work from so if you use a frameserver, serve it straight into virtualdubmod and make a HuffYUV file as your master. The only time I'd honestly advocate using this method is if you have a FAT32 HD or HuffYUV is producing 'dirty frames' as using the frameserver and creating the HuffYUV file in Virtualdub can help with this. This compression method seems to avoid the 'dirty frames' issue and you can also use Virtualdub's segmented avi writing options to help with the 2 gig issue too.
Common Video Export Problems:Cannot write to disk (disk full?) - this is usually a disk full error (you should clean out some more space for your file) but can also hapen if you are trying to overwrite a read-only file or to a read-only drive. This may also happen if you are trying to write a large huffyuv file to a Fat32 drive as it can only store 2gig files. If this happens you will need to export your video in sections.If an error occurs at the same point in the timeline then it's possible that it's something to do with that particular part of the original source. Likewise it may mean that some of the effects you are using at the time are causing the crash, so try removing any unnecessary operations. Particularly, you should never slow down avisynth files too much (like below 10%) as that can lead to crashes. Exporting the AudioWhen the video section has exported correctly (this could take
hours if you are editing from dvd footage, be patient) go to Export
Timeline -> Audio and click 'settings' We are going to export a wav version of the audio as well.
This will help us in processing this in other programs. General Settings:
Audio Settings:
I don't use logarithmic fades but note well that whatever you chose for your project should be chosen here in the export settings otherwise fades will sound different, just like if you choose different video options the video will look different. Click OK to confirm the setting and save that .wav somewhere
safe, clearly named and ready for compression later on.
|
