Setting up your Premiere Pro projectPremiere Pro has many of the same settings as Premiere 5 and 6, but there are some differences in the way they are presented, so it requires a separate page. When you open Premiere Pro you may be greeted with this screen:  You will want to choose New Project. You should then see a screen that looks something similar to this: 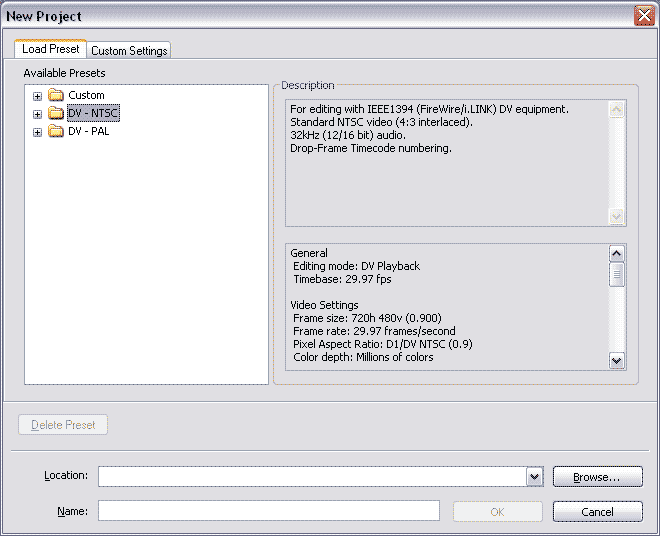 Now, unless you are using a hardware DV
solution, you will not want any of these presets (although you can make
some custom presets of your own based on the information here).
Click Custom Settings and let's set up the project the way we need it. 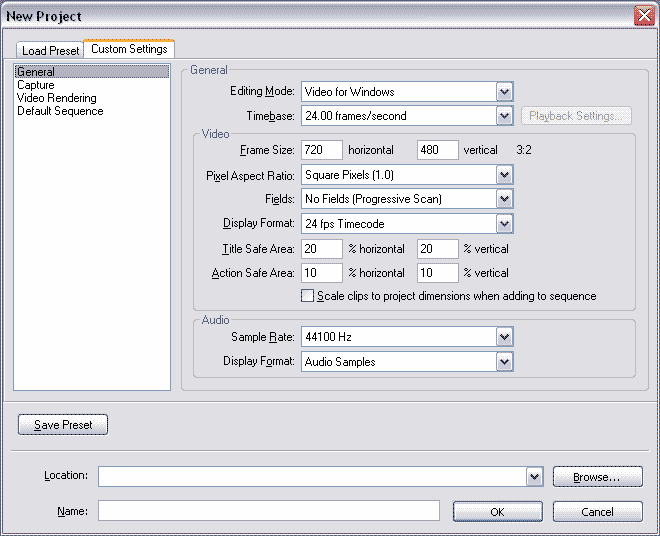 This is where most of the setup options reside. The image above includes the settings that I would choose if editing a Progressive 24fps dvd source. Let's go through the options: General OptionsEditing Mode: This can be DV Playback or Video for Windows (unless your hardware has a third option). If you are editing DV then your options are obvious. If you are editing from clips or from avisynth files then you will need to choose Video for Windows.Timebase: This is important. If you are editing 29.97fps NTSC footage then choose 29.97. If you are editing FILM footage (that has gone through ForceFILM or IVTC) then choose 24 and be sure that your imported footage is 24fps. Do NOT use the 23.98 timebase. It sucks and will cause all sorts of problems. 25fps should be chosen for PAL. General Video OptionsFrame Size is the 'resolution' of your video. You should know this by now. It can be a whole variety of things depending on the video standard you are using (NTSC, PAL, Widescreen etc) and how you have dealt with aspect ratio. Here I have a simple 720x480 aspect ratio which is for editing NTSC DVD footage pixel for pixel.Pixel Aspect Ratio gets used in Premiere
to adjust the display to mimic that of a TV. However, I prefer to see
everything pixel for pixel as it is in the source. The nature of Pixel
Aspect Ratios has been discussed many times earlier. Setting this to
0.9 will not alter the quality of your video but it's good to stick to
one PAR for all your source footage including images so that things
don't get converted to a different PAR by Premiere. Fields is a very important option. You can make everything instantly ugly by setting this incorrectly. If you set a field order and you are actually using non-interlaced footage then Premiere will add interlacing to your footage when processing effects like fades and so on. This is bad. Likewise if you set an incorrect field order then Premiere will process the fields wrong and give you jerky-looking motion in your video. This is equally nasty and cannot be fixed after exporting. For progressive footage set fields to No Fields and for interlaced footage choose the correct field order (Upper or Lower) as you worked it out earlier. Display Format will govern the way the
timeline will look. There are a variety of options, mostly based on the
frame rate (which you should match to the timebase above) and others
based on the frame count or audio samples. Title Safe Area and Action Safe Area are
options that will govern where Premiere Pro will draw guidelines in
order to show you these areas. For those who don't know the "Title
Safe" area is the area of a video that is deemed safe to put text and
not have it cropped by a TV display. "Action Safe" is similar but for,
you guessed it, action. The defaults shown in the image are fine here. Scale Clip to Project Dimensions When Adding
To Sequence is a new feature. The older versions of premiere did
this automatically and it was often very annoying to have a high res
image scaled down badly by Premiere. By having this deselected you can
choose to scale any footage that differs from the project frame size in
any way you like. This can be useful for things like panning large
images etc... General Audio OptionsSample Rate - the Sample Rate of your audio source. If you have ripped from a CD this will be 44100Hz. DVDs contain 48000Hz audio and there are other sample rates you can have in different sources. Use a program like winamp or an audio editor to check if you are not sure what the sample rate of your music is.Display Format Once you have everything set up as you need it, let's move on to the Video Rendering options. The capture options are only required by those using capture cards - if you are then you should refer to your video capture card manual. Video Rendering OptionsThe Video Rendering options will define which codec will be used when previewing things on the timeline. This is a really important setting as the speed of your editing will depend largely on the speed of this codec.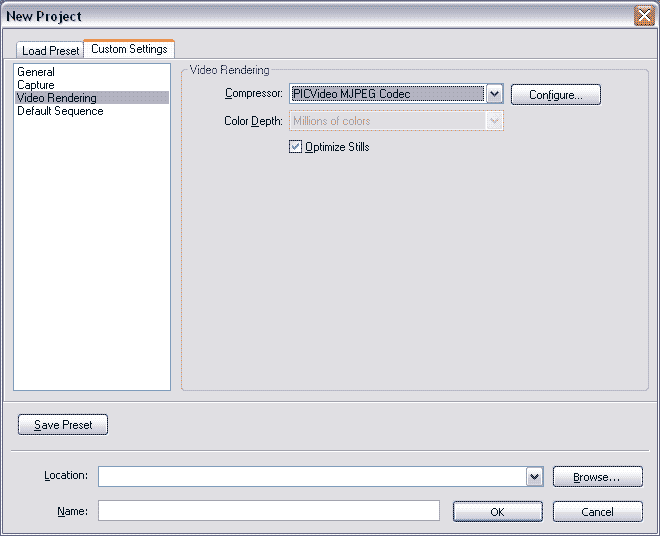 The Compressor is the Preview Codec
and
is the codec which will be used every time you press the Enter key to
render a section of the timeline. As you will want to see previews as
fast as you can, you should choose a fast codec. MJPEG codecs like the PICVideo MJPEG Codec shown above are
very fast, use keyframes and are thus perfect for previews - especially
when low quality is selected as they are lightning quick. Only choose
codecs which have only keyframes. Do not choose DivX, XviD or
similar
as a preview codec. Also some old codecs like Cinepak are the slowest
things on
the planet. If you can select the colour depth on the codec of your
choice, the "Millions of Colors" is RGB24 and "Millions of Colors+" (or
similar - I cant recall the option) would be RGB32.
Optimise Stills will speed up the preview encoding when you have stills on the timeline. Not a necessity but useful all the same. Personally I turn this off for exporting as it can sometimes give odd results, but for previewing it's fine. Great... now finally we have: Default Sequence Options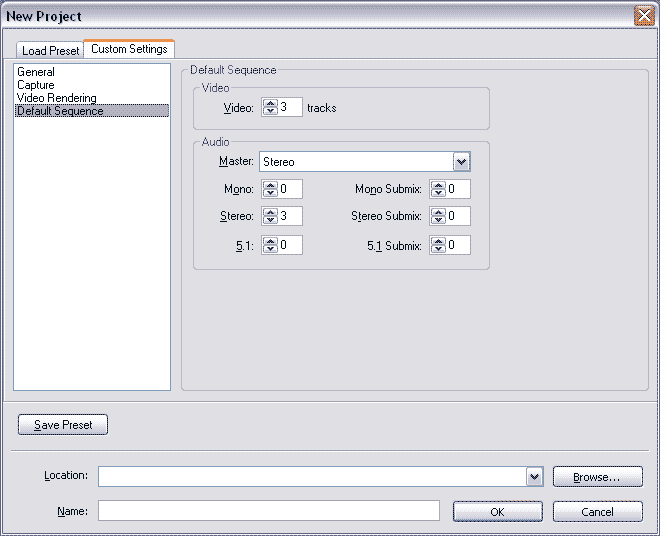 This options page will define how many video and audio tracks will be on your timeline when you start. It's not particularly essential as you can change these settings later. One thing which *is* new however, is the 5.1 audio options. It is very very unlikely that you will be editing with 5.1 audio but it is a possibility. So, you can set up those options here. This is beyond the usual needs of the amv creator, however, so if you want to know more about 5.1 audio editing read the manual. Save Preset Now that you have set up all your options you can, if you like, save them as a Custom Preset. I generally have the following custom presets:
The last preset in my list I will explain briefly. Occasionally I edit video at 29.97fps using progressive footage. I take the FILM footage and add AssumeFPS(29.97) to my avs script. This allows me to edit at 29.97fps but without worrying about interlacing. This is very useful when making videos for a multi editor project that is working on a 29.97fps timeline as field order will never clash with progressive footage. All it means is that my regular clips will run faster than they would in the normal anime. Those are your project settings all done. There are, however, a few other useful Premiere configurations which I want to point out before we finish up here. 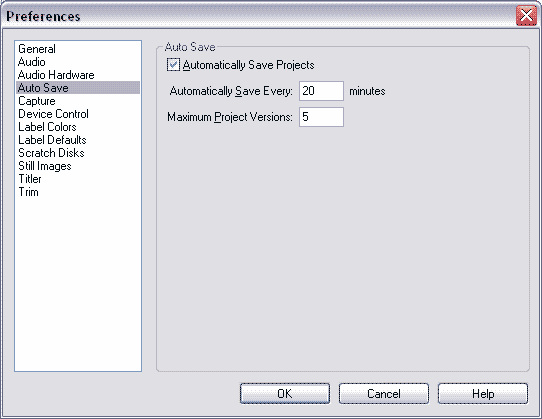 This is possibly the most important setting in the whole program. I actually set this to 5 minutes and put the maximum project versions as high as it will go. This means that if the program crashes then I know that I wouldn't have lost much time. Premiere is able to keep backup copies of your projects as you edit. This is an incredibly useful feature. In Premiere Pro it will save these old versions to a folder called "Adobe Premiere Pro Auto-Save" which will be a subfolder of your regular project file. Once you have your timeline and project in operation, make sure you save it to your hard drive straight away. The auto save feature wont start working until you save the project file somewhere. OK, that should be all. You can now go and edit your video. Be sure to check out the guide on how to export your video from Premiere Pro once you are done.
|