Setting up Windows Movie Maker 2
This is probably going to be the shortest page in the whole guide.
See, Windows Movie Maker requires zero preparation... mostly. There are
some quirks which mean that your input files should try and confirm as
much as possible to the following in order to get the best quality:
1) Make all your footage fit within a square pixel
4:3 frame (such as 640x480 for NTSC). This includes 16:9 footage which
should be letterboxed.
2) Make all your footage 29.97fps if you can, it will be less
problematic. (I know, that sounds vague but wmm2 is very vague).
Remember that Windows Movie Maker uses Direct Show to process
footage. This means that if you happen to be using the DivX decoder,
you may get a divx logo in the corner unless you turn this option off
in the DivX decoder settings. Not that you should be using divx footage
for a video but I've seen it way too many times online and at
conventions and it's just unnecessary.
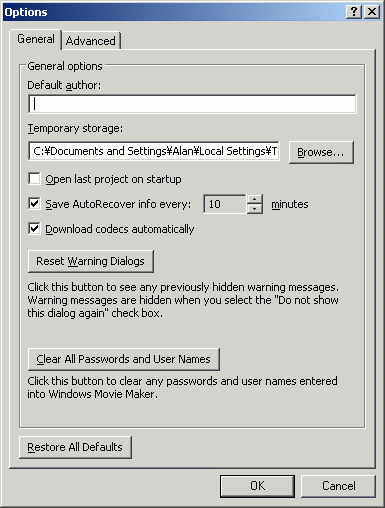
Oh and there are some options:
 Save Auto
Recover info - that's a useful setting. The default is fine but if
you want to make it smaller then that would work too, Save Auto
Recover info - that's a useful setting. The default is fine but if
you want to make it smaller then that would work too,
You may find that the Download Codecs Automatically thing doesn't work
as well as you'd like if you are using divx and things like that. Well,
a) you shouldn't be using that sort of footage to editing your video -
divx sources (and similar) can only be easily edited on keyframes which
limits the things you can do with them b) Microsoft doesn't like
downloading codecs of major competitors.
That's about all for this particular menu.

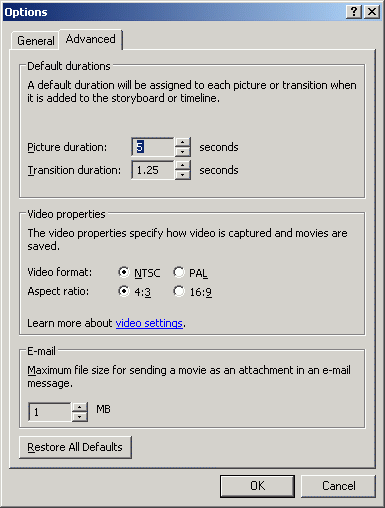
Ooooh check out the advancedness.
Yeah you get so many options here it's just dazzling.
Uh.. yeah. Change the Video properties if you need to and the default
durations if you are feeling frisky. Otherwise the default settings
are fine. The 16:9 option isn't a great deal of use if you are
exporting DV.
That's about it from WMM... You will, however, want to check back for
the exporting guide which will be more useful, I hope.
AbsoluteDestiny -
November 2004
|