ErMaC's Guide to All Things Video - Part 6
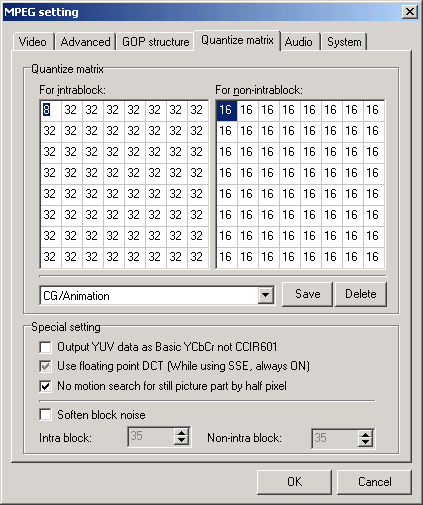
Continued from the first page. IV. More settings Now go to the Quantize matrix tab. Here's mine:
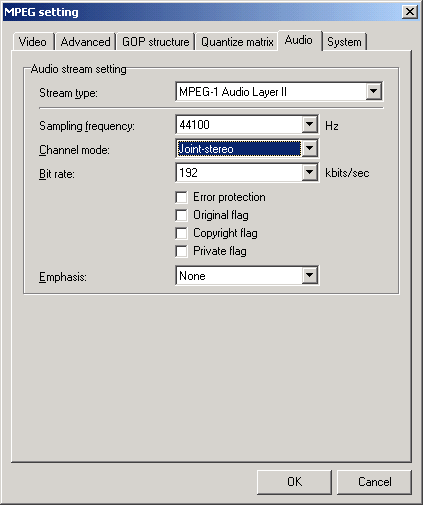
Just select "CG/Animation" from the drop down menu to get the matrix that TMPGEnc recommends for Animation-type footage. Then make sure "No motion search for still picture part by half pixel" is checked. Don't check "Soften block noise" as this is only good when doing low-bitrate encodes. If you're planning on doing VCDs then you'll want to check this box, but we're doing higher bitrate encodes than VCD so we shouldn't run into block noise problems. Now check out the Audio tab:
Make sure to change Channel mode to Joint-stereo, as it will give you better audio quality overall at the possible cost of stereo separation clarity. Finally, under the System tab, make sure MPEG 1 System (automatic) is selected. There's nothing else on this screen so I didn't provide a screenshot. V. Advanced Settings Up until this point things have been pretty easy, right? Well you can stop here and simply encode if you want a decent-quality encode. But if you really want awesome encodes, it's gonna take a lot more than just what we've done. I'm not even started yet. =)
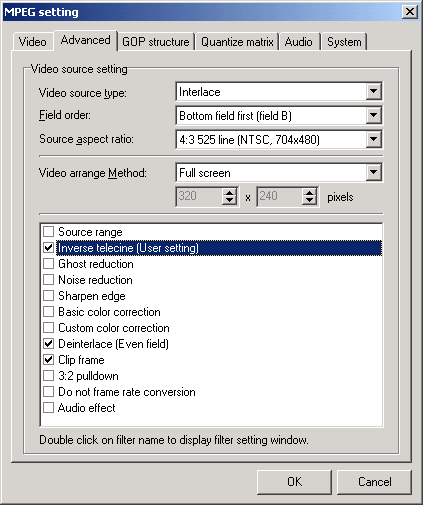
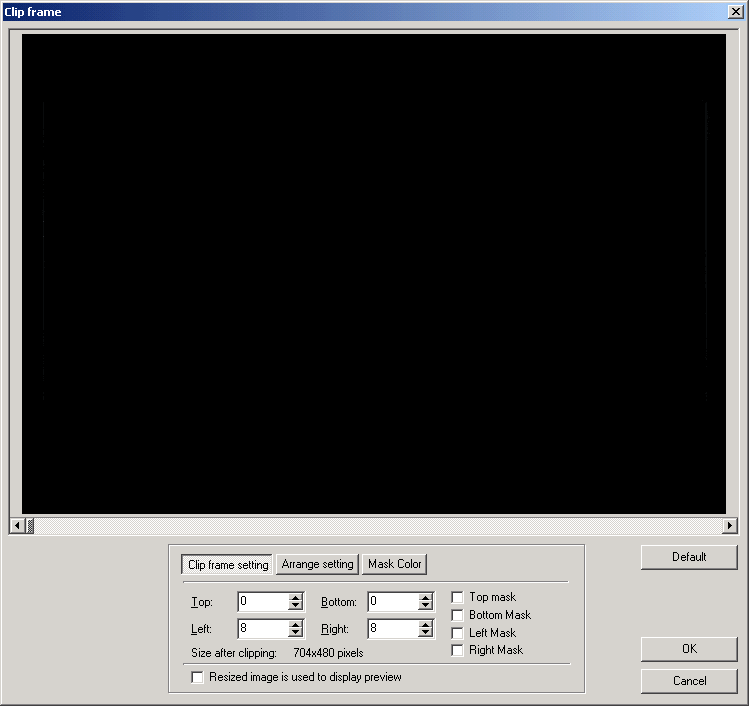
Click the Advanced tab. Now you need to make an important decision. Can you make your video into 23.976 frames per second? The way to determine this is: If all you have are a bunch of simple cuts between good-quality footage off a DVD or something, and the original footage was from film source (i.e. almost all Anime except for recent digital stuff like Sol Bianca, Sin, Love Hina, Excel Saga, the opening sequence of Kare Kano, etc. which are in 29.97 fps) then you can turn the video into 23.976fps fairly cleanly and achieve better video quality because you are encoding fewer frames per second (but getting the same video data in the end) which means more bits per frame. If you can, do the "Inverse Telecine" step. If not, check the "Deinterlace" box, and select Even Field. Don't worry - I know I said Deinterlacing is bad but we're dropping our vertical resolution by half (going from 480 to 240) so to prevent interlacing artifacts from showing up, we need to basically discard half the scanlines to keep things from getting ugly. If you're like me and edit in 720x480, when you go down to 352x240 resolution, you want to have a very clean resize, so I crop off the right-most 8 pixels and the left-most 8 pixels to give me 704x480 (exactly 4x the resolution of my target resolution). You can do this by double clicking the Clip frame option, which gives you the following screen:
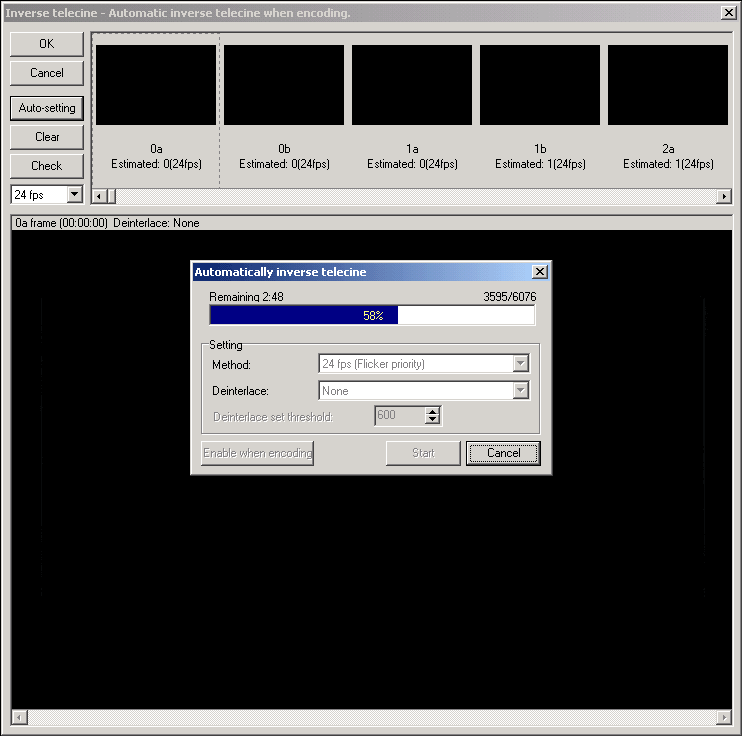
I put 8 in both the left and right boxes, and then make sure the Mask checkboxes are unchecked. Also, click on "Arrange setting" and make sure it's set to Full Screen, not Full Screen (maintain aspect ratio), otherwise it's basically resizing the video to fit the new cropped dimensions which is NOT what you want. VI. Inverse Telecine Now comes the most lengthy part of the process (if you choose to do this step, which I highly recommend doing as it will improve image quality a lot). Checkmark the Inverse Telecine box and then double click it. The following dialog box comes up:
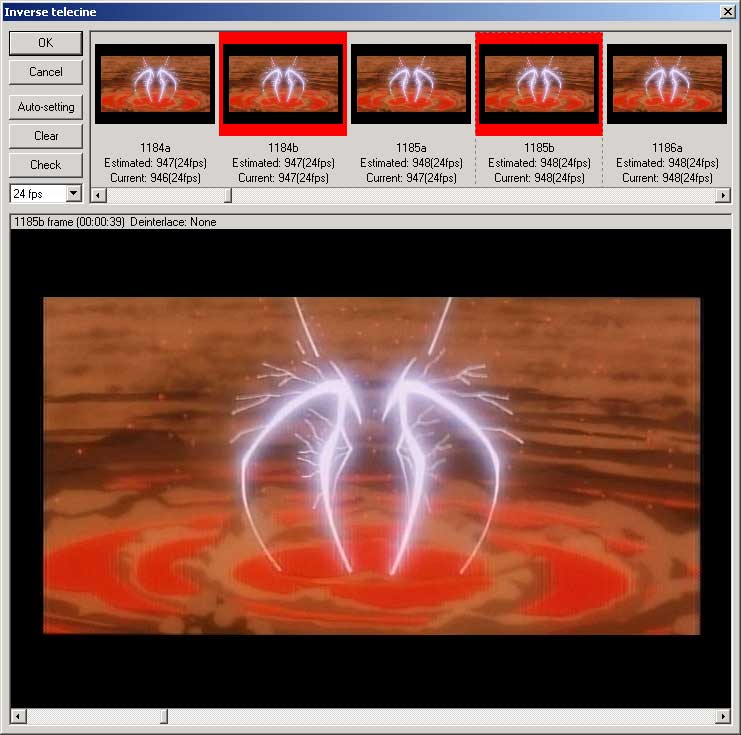
Note that in the screenshot I've already clicked the "Auto-setting" box and let the internal IVTC algorithm do its thing. This is exactly what you should do. Just keep it on "24fps flicker priority" in the options it brings up when you click "Auto-setting" and then go for it (make sure 24fps is selected on the main screen, as this judges the timebase of the preview bar at the top). One its done, you'll have a bunch of red markers up on the top of the dialog box on specific frames. To preview what your video will look like frame-by-frame, click on the big picture (the one in the bottom portion of the window) and then hit the left or right buttons on the keyboard (this is the fastest way, you can also use the mouse and click the scroll bar). This will advance frame-by-frame. If you run into a frame that the internal algorithm screwed up on and it looks interlaced, like this:
then you need to go to the bar on the top and click on the one in the middle (this will remove the red marker) and then click on the frames around it until you've fixed the problem, like this:
Yes, you need to go through the WHOLE video and make sure it's good. Well, you don't have to, but I do because I want it to look its best. Finally go back and check the Video tab and make sure the FPS is now 23.976, like so:
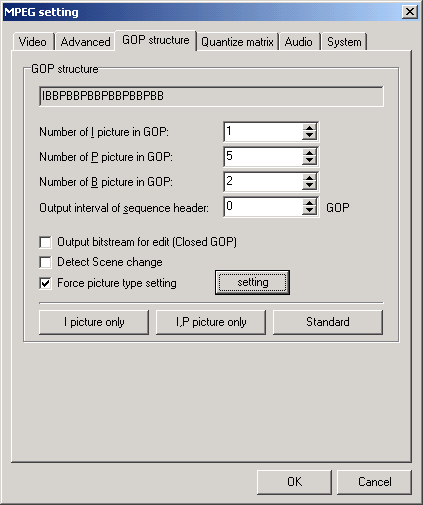
VII. Manual Keyframe Insertion Now comes the last really long step. It's not as long as the last one, but it's also very important. Go to the GOP Structure tab, and put in the following settings:
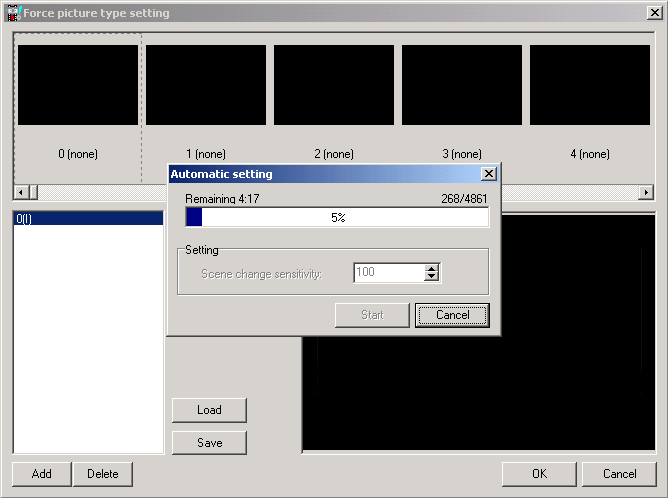
Then click the settings tab, and you should get another dialog box very similar to the Inverse Telecine one:
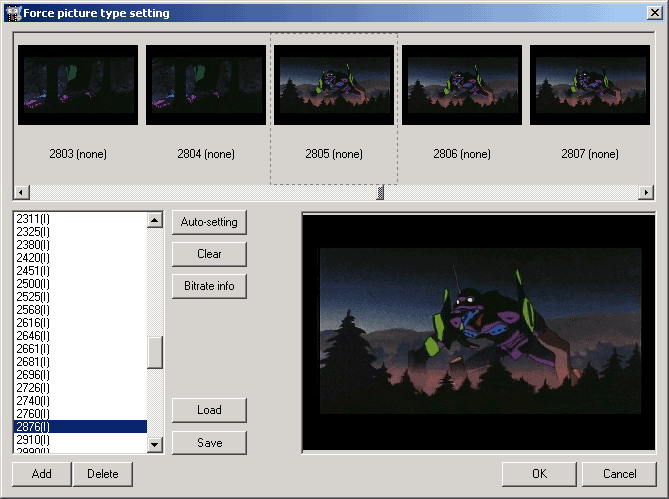
I've already clicked the "Auto-setting" button (its currently obscured by the popup) and hit Start. Then I let it go through the whole thing looking for scene changes where it should insert keyframes. When it's all done I scroll along the upper box looking at the little previews, checking to make sure all the Keyframes it's put in really should be keyframes, and adding ones where there should be keyframes but the internal algorithm missed them. For instance:
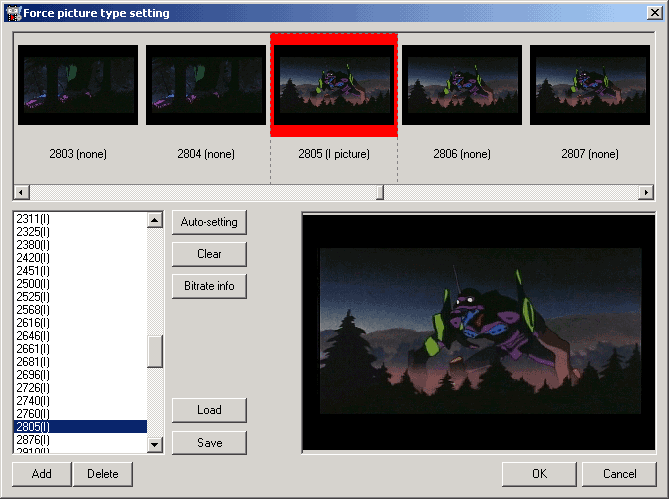
The internal algorithm missed this scene change, because the two scenes are very similar in color (and the video being letterboxed doesn't help either). Since this really should be a keyframe, I'll specify it should be one by clicking on the preview picture on top, causing it to light up red:
I go through the whole video like this adding keyframes where there are scene changes, in case the internal algorithm missed them. Some basic guidelines for when to add keyframes are:
VIII. Encoding the file Now that you've gotten all your settings right, it's time to encode. This could take a very long time depending on the length of the video, the codec it's compressed in, and the speed of your computer. Once you're done you should have a very nice-looking file! Next Time - How to do Awesome DivX Encodes with Nandub |
